Playing with Lights
How to Have Fun with Long-Exposure Photography
George Pereira, Photography Reporter
There are a few ways to take photos in the dark of night and have them turn out half-decent. The camera can be set to that oh-so-dreadful auto mode and, if the hand is kept steady enough, a slightly blurred and very oversaturated photo is the reward.

Or you could use the flash on your camera and get a picture with a blown-out foreground and pitch-black backgrounds.

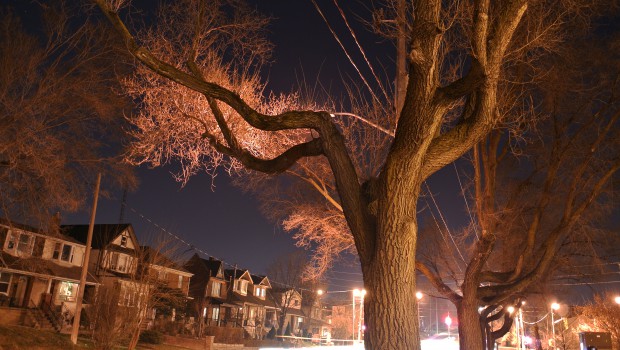
What you really want to be doing at night is long-exposure photography. The method of the gods, using long-exposure correctly can give you photos like this.

Keep in mind; you must have a camera capable of adjusting shutter speed and aperture (f-stop), as this is the only way to properly capture images at long-exposure. Having a tri-pod is also a must, as taking these photos free hand will result in a shiny mess of a photo.
The only concrete rule in long-exposure photography is to have the camera set to the Manual mode (the M setting on the mode dial). This feature comes standard on any entry-level DSLR, and some high-end compacts and allows you to adjust shutter speed and aperture (f-stop). The rest is chance and experimentation.
Take a step outside long after the sun has set and look around for an interesting pattern, shape, or arrangement of colours. If anything catches your eye, set down the tri-pod, aim at the target object and adjust the camera’s settings according to the exposure dial.
Messing with manual functions can be intimidating but it’s relatively simple in long-exposure work. Set the aperture to the fastest f-stop (3.5 on a kit lens but some lenses are capable of faster), as this allows the greatest amount of light to hit the sensor and reduces grain. ISO should be set to as low as possible, which is either 100 or 200 depending on the camera.
Shutter speed is the setting that requires the most attention but paying attention to the exposure meter provides all the help you’ll need in choosing the right speed. A series of dots with a minus symbol (-) and a plus symbol (+) at either end is how you’ll find it and the meter tells the photographer whether the photo is going to over or underexpose. For the purpose of these photos, you’ll want the indicator to be either right on the midpoint or just a few clicks closer to the plus.
With the aperture (f-stop) and the ISO both set to as low as possible, expect to have your shutter speed set to at least 4 seconds when dealing with very dark scenarios. Your photo will be lit by available lighting, which will come from things like streetlights, porch lamps, and traffic signals. Once your settings have been optimized, press the shutter release and wait a few seconds…

Voila.
Not every photo taken at long exposure will turn out radiant but experimenting is always encouraged. Cars and buses that pass through a photo during the exposure will paint paths of light and low-strength flashlights allow for an extra degree of creativity.
Light painting involves taking a long-exposure photo and ‘drawing’ an image in the air with a small light source.
“What entices me about light painting is that it captures an extended period of time and creates a still image,” says James McCowan, a photographer and long-exposure enthusiast.

Photo courtesy of James McCowan (c)
Long-exposure photos can be subtle or they can be stunning and it is entirely up to the photographer and the decision on how much light to allow. Go out at night, keep an eye open, and never be afraid to put down the tripod and take a photo because, remember, experimenting is always encouraged.
Related Posts

How to post to Radix on WordPress →

Come for the Comics, Stay for the Company →

Wishy washy ways no longer warranted in the film industry →
